As some of you may already know, I've been working on OpenIddict 3.0 for a few months now. One of the main goals of this major release is to merge ASOS (a low-level OpenID Connect server middleware for ASP.NET Core) and OpenIddict (a higher-level OIDC server library designed for less advanced users) into a unified code base, that would ideally represent the best of both worlds.
As part of this task, a new feature was added to OpenIddict: the degraded mode (also known as the ASOS-like or bare mode). Put simply, this mode allows using OpenIddict's server without any backing database. Once enabled, all the features that rely on the OpenIddict application, authorization, scope and token managers (contained in the OpenIddict.Core package) are automatically disabled, which includes things like client_id/client_secret or redirect_uri validation, reference tokens and token revocation support. In other words, this mode allows switching from an "all you can eat" offer to a "pay-to-play" approach.
A thread, posted on one of the aspnet-contrib repositories gave me a perfect opportunity to showcase this particular feature. The question asked by the commenters was simple: how can I use an external authentication provider like Steam (that implements the legacy OpenID 2.0 protocol) with my own API endpoints?
Steam doesn't issue any access token you could directly use with your API endpoints. Actually, access tokens are not even a thing in OpenID 2.0, which is a pure authentication protocol that doesn't offer any authorization capability (unlike OAuth 1.0/2.0 or OpenID Connect).
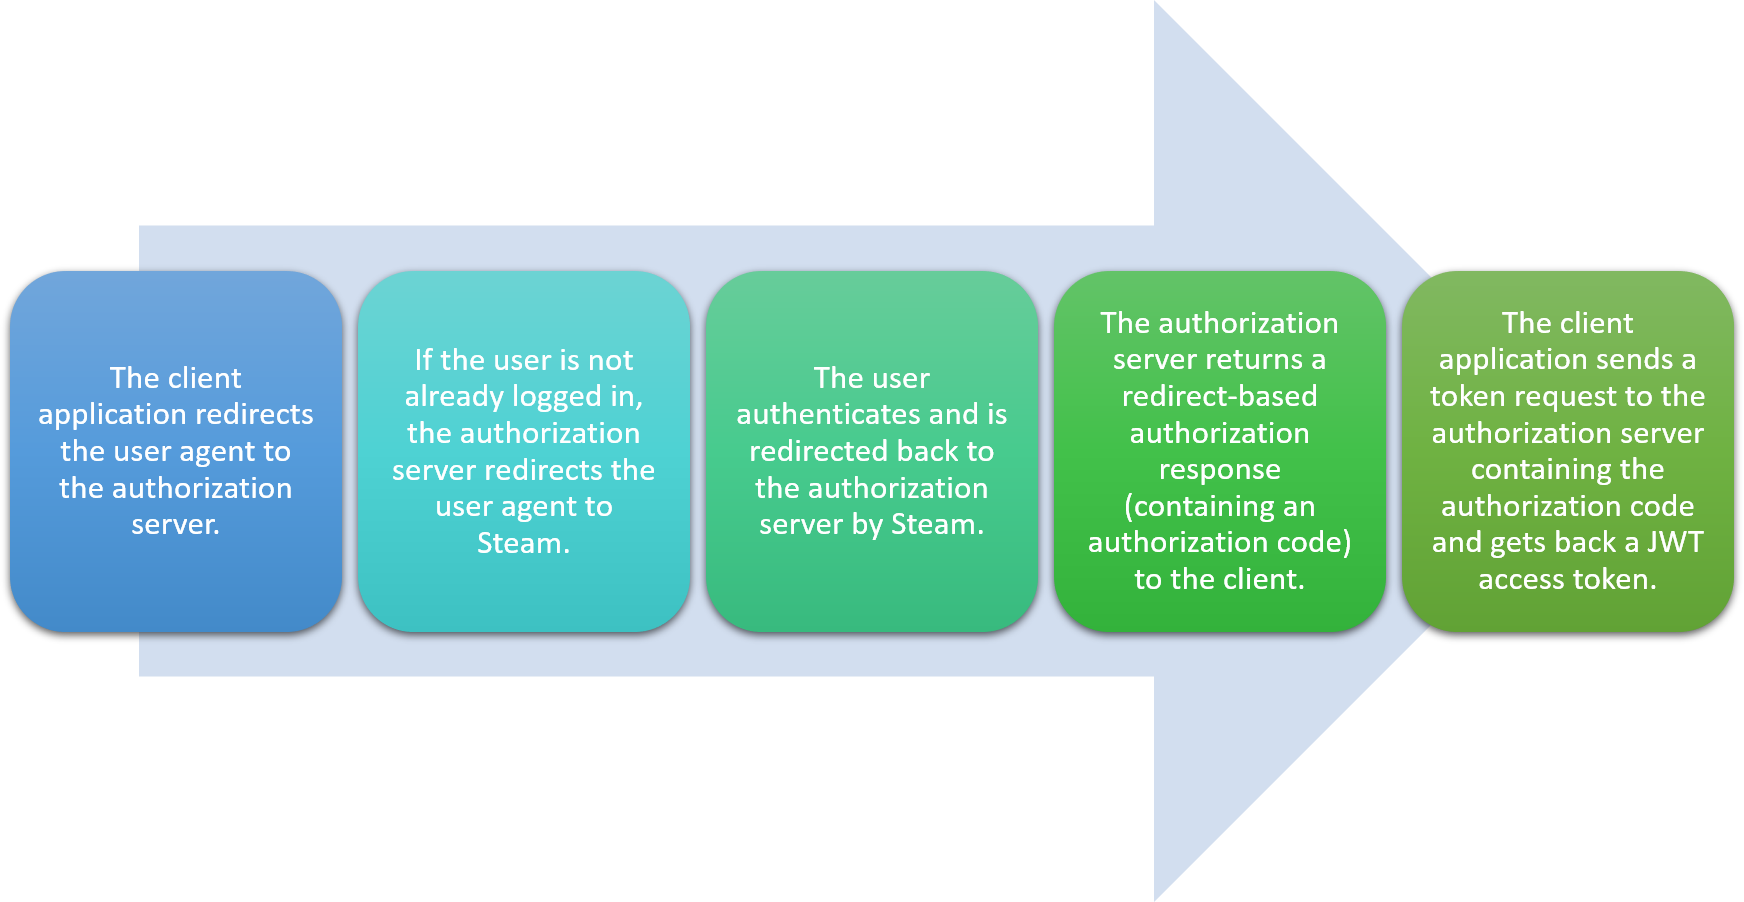
So, how do we solve this problem? The most common approach typically consists in creating your own authorization server between your frontend application and the remote authentication provider (here, Steam). This way, when the application needs to authenticate a user, the user is redirected to the authorization server, that delegates the actual authentication part to another party. Once authenticated by that party, the user is redirected back to the main authorization server, that issues an access token to the client application.

This a super common scenario, that can be implemented using standard protocols like OpenID Connect and well-known implementations like OpenIddict or IdentityServer. However, these options are sometimes considered "overkill" for such simple scenarios. After all, why would you need a fully-fledged OIDC server – with login, registration or consent views – when all you want is to delegate the actual authentication to another server in a totally transparent and almost invisible way?
Rolling your own protocol is tempting... but a very bad idea, as you can't benefit from all the security measures offered by standard flows like OAuth 2.0/OpenID Connect's authorization code flow, whose threat model is clearly identified for many years now. As you may have guessed by now, this is precisely where OpenIddict 3.0's degraded mode can come in handy.
Implementing a minimalist OpenID Connect server with OpenIddict 3.0
Add the Steam authentication integration
First, we'll start by creating an ASP.NET Core 3.1 API application and by adding the aspnet-contrib Steam provider and an instance of the cookies authentication handler (that will be used to store the user identity retrieved from Steam).
For that, add the following dependency in your .csproj:
1 | <Project Sdk="Microsoft.NET.Sdk.Web"> |
Then, update ConfigureServices to register the Steam and cookies authentication handlers:
1 | public void ConfigureServices(IServiceCollection services) |
You'll also need to update Configure to call app.UseAuthentication():
1 | public void Configure(IApplicationBuilder app, IWebHostEnvironment env) |
Add the OpenIddict server and JWT validation components
Now, we'll need to add the OpenID Connect server part. For that, add the following packages:
1 | <PackageReference Include="OpenIddict.Server.AspNetCore" Version="3.0.0-beta1.20311.67" /> |
Next, tweak ConfigureServices to register the OpenIddict ASP.NET Core server and validation services, with only the options we need: the authorization code flow allowed, the authorization and token endpoints active and the degraded mode enabled:
1 | services.AddOpenIddict() |
At this point, trying to launch the application will result in an exception being thrown:
InvalidOperationException: No custom authorization request validation handler was found. When enabling the degraded mode, a custom
IOpenIddictServerHandler<ValidateAuthorizationRequestContext>must be implemented to validate authorization requests (e.g to ensure the client_id and redirect_uri are valid).
This is expected: when using the degraded mode, you must add custom code to validate things that are normally validated for you by OpenIddict, which includes the client_id or redirect_uri, that must be checked to ensure users are not redirected to unsafe/unknown addresses.
To fix that error, we'll need to register a handler for the ValidateAuthorizationRequest event. Since we enabled the token endpoint, we'll also need one to validate token requests.
There are multiple ways to create and register event handlers in OpenIddict: you can create a dedicated class implementing the generic IOpenIddictServerHandler<TContext> interface – which allows using dependency injection – or you can use inline event handlers.
To keep things simple, we'll use inline event handlers (directly defined in ConfigureServices) and static hard-coded checks:
1 | services.AddOpenIddict() |
Final and most interesting part: gluing everything together, so that OpenIddict can redirect users to Steam and generate an authorization response containing an authorization code that the client application will be able to use to redeem an access token. To implement that, we need to use the HandleAuthorizationRequest event:
1 | options.AddEventHandler<HandleAuthorizationRequestContext>(builder => |
Adding a handler for HandleTokenRequestContext is not necessary: in this case, OpenIddict will automatically reuse the user identity extracted from the authorization code to produce an access token returned as part of the token response.
Creating a .NET demo console
To test our minimalist OpenID Connect proxy, we'll now create a separate .NET Core 3.1 console referencing the IdentityModel.OidcClient package:
1 | <Project Sdk="Microsoft.NET.Sdk"> |
There are typically 2 ways to handle authorization responses in desktop/mobile applications (i.e applications that don't run inside a browser):
Running a local HTTP server: this works well for desktop applications, but might be hard to implement in certain enterprise environments with strict firewall configurations.
Registering an application-specific URI scheme (e.g:
myapp://): this is the best approach... and pretty much the only option on most mobile operating systems, where the first option is not always possible, for security reasons.
Since the first option is easier to implement, it's the one we will choose for this demo client:
1 | using System; |
Testing the authentication process
For that, start the two applications (server and client). Once the client is started, press a key to start the authentication process. When doing so, the default browser will be launched and you'll be redirected to the authorization server. If you're not already logged in, you'll be immediately invited to authenticate using your Steam account:

After logging in, an authorization response will be returned to the client console, that will automatically send a token request to finish the process:

And voilà, you're now ready to create your first APIs! To accept the JWT bearer tokens issued by OpenIddict, don't forget to decorate your controllers/actions with:
1 | [] |