This post is the eighth part of a series of blog posts entitled Creating your own OpenID Connect server with ASOS:
- Introduction
- Choosing the right flow(s)
- Registering the middleware in the ASP.NET Core pipeline
- Creating your own authorization provider
- Implementing the resource owner password credentials grant
- Implementing the authorization code and implicit flows
- Adding custom claims and granting scopes
- Testing your authorization server with Postman
- Conclusion
The sample used in this post can be found in the AspNet.Security.OpenIdConnect.Samples repository, that also hosts the Cordova, MVC and SignalR samples for ASOS.
For clarity, it implements both the authorization code flow and the password flow, but doesn't use any membership stack (the user credentials are hardcoded in the authorization provider class and a fake identity is always used to create tokens).
To test REST services, one of the easiest options is indisputably to use Postman. If you're not already familiar with Postman, I encourage you to read the documentation.
Retrieving an access token using the resource owner password credentials grant
Using the password flow with Postman is quite straightforward:
- Select
POSTas the HTTP method. - Fill the
Request URLinput with the absolute address of the token endpoint. - Click on the
Bodytab and choose thex-www-form-urlencodedencoding. - Add the OAuth 2.0 parameters required by the specification, as shown on this screenshot:
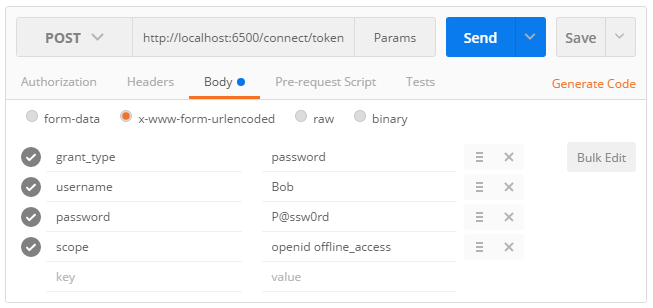
1 | POST /connect/token |
If your request is valid, an access token, an identity token and a refresh token should be returned:
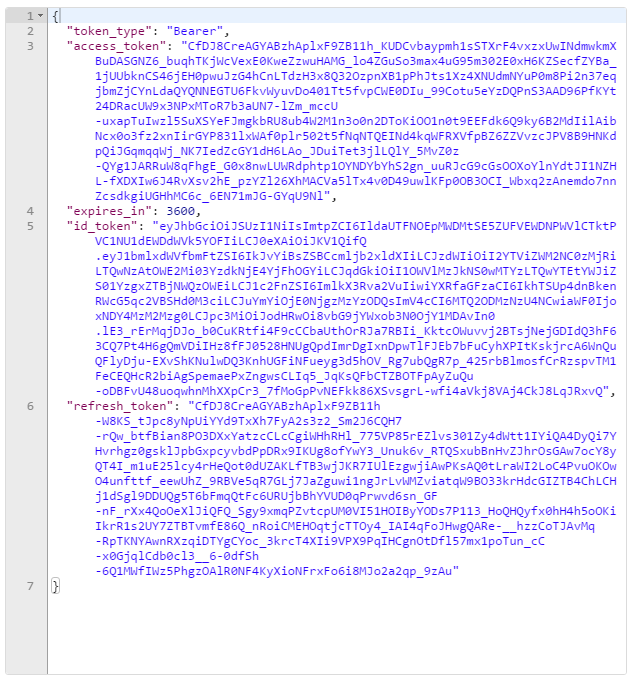
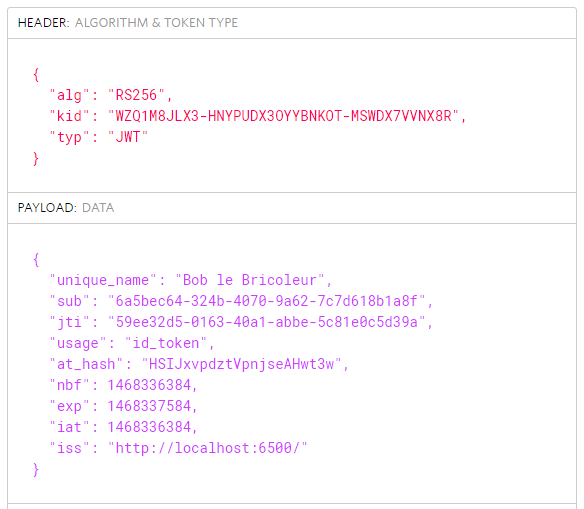
While the access token and the refresh token are encrypted and opaque for the client, the identity token can be easily deserialized using a tool like jwt.io:
Making an API request using the access token issued by ASOS
To attach an access token to an API request, click on the Headers tab and add a new Authorization header. Make sure to prefix the header value with the Bearer scheme (plus a space separating the scheme and the access token).

1 | GET /api/message |
If the access token is still valid, you should see this exact output message:

Retrieving an access token using the authorization code flow
Using the authorization code flow is generally more complicated, but Postman offers a very simple and convenient way to retrieve an access token without having to write a single request.
To start a new authorization flow, click on the Authorization tab, select OAuth 2.0 and press Get new access token:
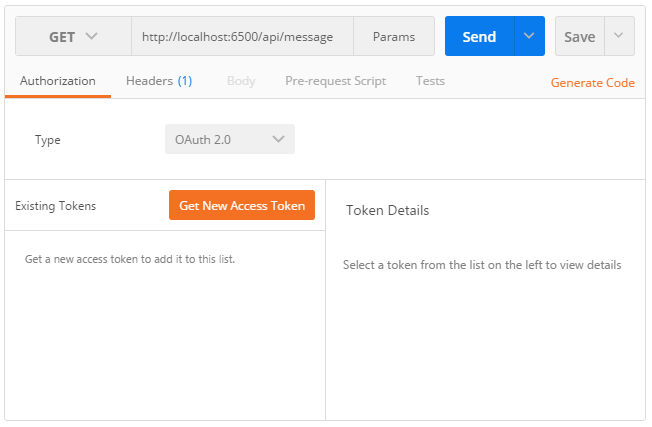
When the OAuth 2.0 configuration popup appears, select Authorization code in the dropdown list and populate the required fields by specifying the authorization endpoint, the token endpoint, the client identifier, the callback URL and optionally, a scope and a token name.
When running the sample from a location that is not accessible from Internet, make sure to check the Request access token locally checkbox.
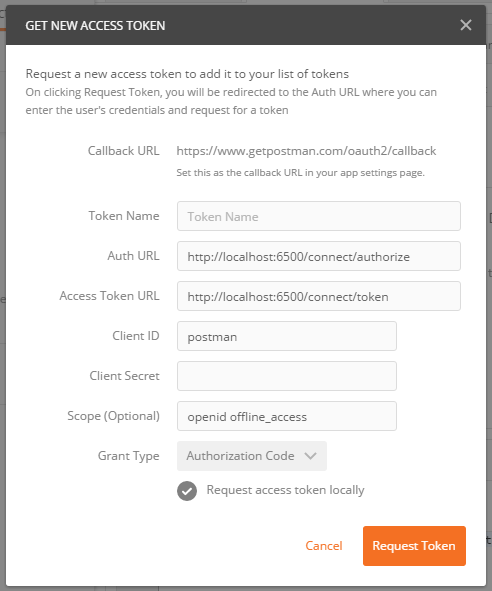
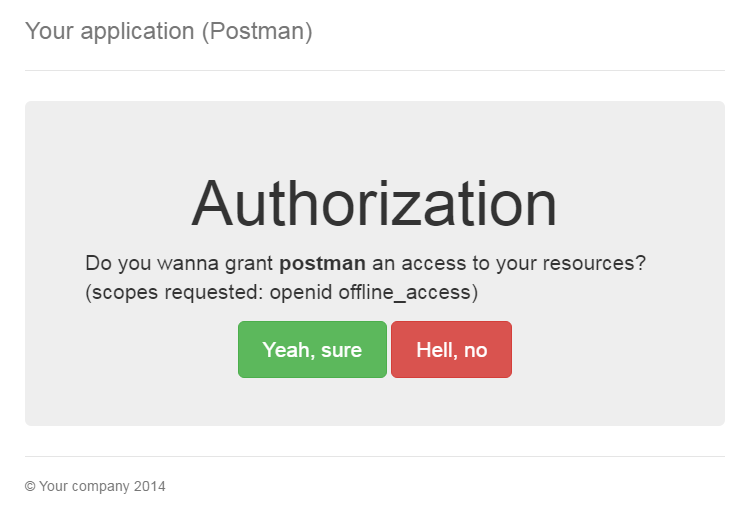
If the request parameters are valid, you should be prompted by the authorization consent form returned by AuthorizationController:
After granting the authorization, Postman will send a token request and retrieve a new access token it will add under the Existing tokens list:
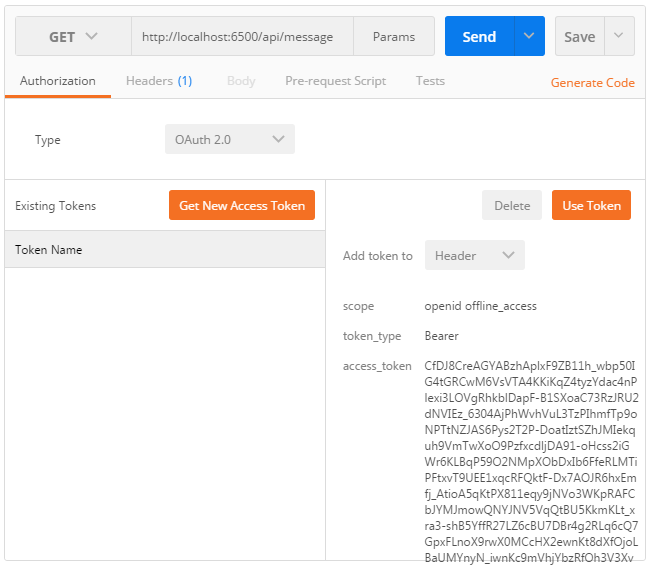
Select Header in the dropdown list and press Use token to tell Postman to attach the access token to the API request, like you manually did in the previous step. If the token is still valid, clicking on Send will return a successful message:

Next part: Conclusion.