If you're an avid reader of Andrew Lock's blog (certainly one of the best .NET blogs out there!), you probably figured out that the title of this blog post is very similar to his latest post, Can you use the .NET 8 Identity API endpoints with IdentityServer?, in which he describes how you could (but really shouldn't 😂) use ASP.NET Core 8's Identity API endpoints with an OAuth 2.0/OpenID Connect server stack like IdentityServer or OpenIddict.
The similarity is of course completely deliberate, as his post motivated me to write this one.
The approach described in Andrew's post – that mainly consists in using the Identity API endpoints introduced by .NET 8 to handle the user authentication part – also works with OpenIddict, so there's no point covering the same aspects twice: if you haven't read it, please read Andrew's post before reading mine.
Instead, we're going to do something even crazier ('cause why not? 😎): using OpenIddict to process token requests handled by the Identity API login endpoint... and generate token responses containing either JWT or ASP.NET Core Data Protection access tokens!
ASP.NET Core Identity's API endpoints are faux-OAuth 2.0 endpoints...
As a preamble, it's important to note that while the ASP.NET team mentioned multiple times that the Identity API endpoints are not an OAuth 2.0 implementation, it's actually a non-standard equivalent of the OAuth 2.0 resource owner password credentials grant, as I demonstrated here.
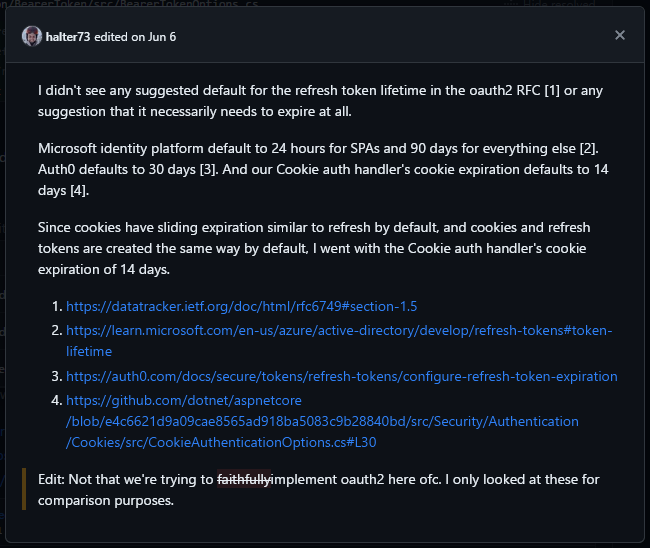
(if you're not convinced yet these endpoints are "heavily inspired" by OAuth 2.0, this message posted by Stephen Halter – who wrote the ASP.NET Core Identity API endpoints feature – should speak for itself 😁)
... that can be used with OpenIddict nevertheless
Why is this "OAuth 2.0/not OAuth 2.0" distinction important you may ask? Well, since the ASP.NET Core Identity API endpoints implement a clone of the OAuth 2.0 resource owner password credentials grant with only a few differences, it's going to be very easy to use OpenIddict's advanced events model to make it compatible with the non-standard protocol created by the ASP.NET team.
Create a minimal ASP.NET Core API and enable the ASP.NET Core Identity API endpoints
For that, create a new .csproj referencing the ASP.NET Core Identity UI, the OpenIddict ASP.NET Core metapackage and the EF Core packages:
using Microsoft.AspNetCore.Authentication.BearerToken; using Microsoft.AspNetCore.Identity; using Microsoft.EntityFrameworkCore; using OpenIddict.Server.AspNetCore; using OpenIddict.Validation.AspNetCore; using OpenIddictIdentityEndpoints; using OpenIddictIdentityEndpoints.Data; using System.Security.Claims;
To initialize the database with the Identity and OpenIddict tables, run dotnet ef migrations add CreateOpenIddictSchema and dotnet ef database update. Once it's initialized, you can create a new account by sending a JSON payload to /register containing the email address and the password:
So far, nothing fancy: EF Core, ASP.NET Core Identity and OpenIddict are configured like in any other app. The only interesting part is that OpenIddict is set up to allow the password flow and use the same /login address for its token endpoint as the login endpoint used by Identity (added for you when calling app.MapIdentityApi<IdentityUser>()).
Add custom event handlers to tweak the token endpoint processing logic
If you try to send a request to Identity's login endpoint, all you'll get is an OAuth 2.0 error returned by OpenIddict telling you that that the specified Content-Type HTTP header is not valid:
1 2 3 4 5
{ "error":"invalid_request", "error_description":"The specified 'Content-Type' header is invalid.", "error_uri":"https://documentation.openiddict.com/errors/ID2082" }
It's expected: while the custom protocol derived by the ASP.NET team uses JSON as input, the standard OAuth 2.0 protocol uses formURL-encoded requests.
To accomodate that, we'll need to use OpenIddict's events model to extract OAuth 2.0 token requests from JSON payloads instead of formURL-encoded requests. We'll also need to map non-standard parameters and claims to their standard equivalent.
For that, we'll create an extensions class that will centralize our custom event handlers:
using Microsoft.AspNetCore; using OpenIddict.Abstractions; using System.Diagnostics; using System.Security.Claims; usingstatic OpenIddict.Abstractions.OpenIddictConstants; usingstatic OpenIddict.Server.AspNetCore.OpenIddictServerAspNetCoreHandlerFilters; usingstatic OpenIddict.Server.AspNetCore.OpenIddictServerAspNetCoreHandlers; usingstatic OpenIddict.Server.OpenIddictServerEvents;
namespaceOpenIddictIdentityEndpoints;
publicstaticclassOpenIddictServerExtensions { publicstatic OpenIddictServerBuilder AddCustomHandlers(this OpenIddictServerBuilder builder) { // Remove the built-in event handler responsible for extracting standard OAuth 2.0 token requests // (that always use form-URL encoding) and replace it by an equivalent supporting JSON payloads. builder.RemoveEventHandler(ExtractPostRequest<ExtractTokenRequestContext>.Descriptor); builder.AddEventHandler<ExtractTokenRequestContext>(builder => { builder.UseInlineHandler(async context => { var request = context.Transaction.GetHttpRequest() ?? thrownew InvalidOperationException();
// Enable buffering and rewind the request body after extracting the JSON payload to ensure // the ASP.NET Core Identity API endpoint can also resolve the request parameters.
// Unlike a standard OAuth 2.0 implementation, ASP.NET Core Identity's login endpoint doesn't // specify the grant_type parameter. Since it's the only authentication method supported anyway, // assume all token requests are resource owner password credentials (ROPC) requests. context.Request.GrantType = GrantTypes.Password;
// The latest version of the ASP.NET Core Identity API package uses "email" instead of the // standard OAuth 2.0 username parameter. To work around that, the email parameter is manually // mapped to the standard OAuth 2.0 username parameter. context.Request.Username = (string?) context.Request["email"]; });
// OpenIddict requires specifying the standard OpenID Connect "sub" claim that identifies // the user. Since it's not specified by ASP.NET Core Identity's login endpoint, it is // manually mapped from the ClaimTypes.NameIdentifier claim that is added by Identity. context.Principal.SetClaim(Claims.Subject, context.Principal.FindFirst(ClaimTypes.NameIdentifier)?.Value);
// Allow OpenIddict to store all the claims generated by ASP.NET Core Identity in the access tokens. context.Principal.SetDestinations(static claim => [Destinations.AccessToken]);
returndefault; });
builder.SetOrder(int.MinValue); });
return builder; } }
You can now easily register your custom event handlers by calling the options.AddCustomHandlers() extension we just added:
Amend the BearerTokenOptions to forward the authentication operations to OpenIddict
At this point, if you run the application as-is, you'll see that the /login responses are still generated by the ASP.NET Core Identity API stack and not by OpenIddict. The explanation is actually quite simple: we're still missing the secret sauce that is needed to let OpenIddict generate token responses for the requests handled by the /login API endpoint.
For that, we'll need to tweak the BearerTokenOptions to forward the sign-in operations to the OpenIddict server stack. It's also the right place to redirect token validation to the OpenIddict validation stack:
1 2 3 4 5 6 7 8 9 10 11 12
builder.Services.Configure<BearerTokenOptions>(IdentityConstants.BearerScheme, options =>
{
    // Forward the sign-in responses returned by ASP.NET Core Identity's
    // login API endpoint to the OpenIddict server stack so that OpenIddict
    // can generate a token response based on the principal prepared by Identity.
    options.ForwardSignIn = OpenIddictServerAspNetCoreDefaults.AuthenticationScheme;

    // Forward the token authentication operations to the OpenIddict validation stack.
    options.ForwardAuthenticate = OpenIddictValidationAspNetCoreDefaults.AuthenticationScheme;
    options.ForwardChallenge = OpenIddictValidationAspNetCoreDefaults.AuthenticationScheme;
    options.ForwardForbid = OpenIddictValidationAspNetCoreDefaults.AuthenticationScheme;
});
With that in place, if you send a /login request with valid user credentials, you'll see that a standard OAuth 2.0 response is returned by OpenIddict and contains an encrypted JWT token:
What if I prefer ASP.NET Core Data Protection for my tokens?
Just like the ASP.NET Core Identity API endpoints, OpenIddict can use ASP.NET Core Data Protection as the token format. For that, just call options.UseDataProtection() from both .AddServer(...) and .AddValidation(...) and you'll get opaque tokens:
If you omit the custom event handlers needed to work around the non-standard aspects of Microsoft's protocol/ROPC-clone, you can see that there's actually no horrible hack required to use OpenIddict as a replacement for the default ASP.NET Core Identity API response generator.
But you might be wondering: how does that work concretely?
This "voodoo magic" (🤣) is actually made possible by two OpenIddict features:
A native IAuthenticationHandler integration: just like the ASP.NET Core cookie authentication or the OIDC client handler developed by Microsoft, OpenIddict integrates with ASP.NET Core by registering an IAuthenticationHandler implementation and by configuring an authentication scheme that can be called to generate a token response. By redirecting the ForwardSignIn scheme to OpenIddict, we're actually bypassing the default response generation logic and replacing it by OpenIddict's logic, in a completely transparent way.
A built-in request pass-through mode: inherited from Katana's OAuthAuthorizationServerMiddleware, OpenIddict features a powerful pass-through mode that allows handling a token request outside the OpenIddict processing pipeline: OpenIddict starts processing the request by validating it and immediately asks ASP.NET Core to keep invoking the rest of the middleware chain so that the request can be handled in an MVC controller, in a minimal API action or in a middleware. When the application wants to return a valid token response, all it has to do is call SignIn(principal, OpenIddictServerAspNetCoreDefaults.AuthenticationScheme) with a ClaimsPrincipal instance containing the claims that will be used to create access tokens (or other types of tokens for more elaborate flows).
It's cool, but should I really do that?
No! While this works, I wouldn't recommend using this approach. Actually, I wouldn't really recommend using the ASP.NET Core Identity API endpoints in most cases, for exactly the same reasons Andrew Lock mentioned in his Should you use the .NET 8 Identity API endpoints? post (you can't even disable each API endpoint individually! What if you don't want to let users create accounts themselves...?!)
It's also worth noting that the OAuth 2.0 resource owner password credentials grant is not the most flexible flow: it's unusable with third-party applications (since they have a direct access to the username/password, which defeats the whole purpose of using OAuth 2.0), it's incompatible with social providers authentication and passwordless authentication. In general, options like the OpenID Connect code flow are much better and much more flexible.