With the recent announcement that IdentityServer is transitioning to a commercial model, some of you may already be looking for alternatives. I'd like to reiterate that I encourage every IdentityServer user to keep using it and pay for it, but I also realize that not everyone will be able to afford an IdentityServer licence (whose cheapest plan is $1,500/year). As such, it was not a surprise to receive many mails from IdentityServer users evaluating their options soon after the announcement.
Even though both implement the OpenID Connect and OAuth 2.0 specifications, OpenIddict and IdentityServer4 are very different under the hood and have different approaches: IdentityServer4 was designed as a general and ready-to-use identity provider for ASP.NET Core while OpenIddict 3.0 aims at offering a fully modular OpenID Connect server and validation stack that can be used not only on ASP.NET Core 2.1 (.NET Framework and .NET Core), 3.1 and 5.0, but also in legacy ASP.NET >= 4.6.1 applications using OWIN/Katana.
Internally, the two server stacks don't have much in common: IdentityServer4 uses a traditional and linear services-based approach (with request/token validators and response generators) while OpenIddict 3.0 uses a completely different model based on events and asynchronous events handlers: each handler is responsible for a very specific task (e.g ensuring a redirect_uri is not malformed and doesn't include a fragment) and all the handlers can be removed, reordered and even replaced by custom handlers for those who need to override the default logic used by OpenIddict 3.0.
Unlike IdentityServer4, OpenIddict doesn't ship with any membership stack integration, which is something developers must implement themselves. In the OpenIddict world, this is typically done by adding an authorization controller that serves as bridge between the user authentication part (generally implemented using ASP.NET Core Identity) and the OpenID Connect authorization part. Concretely, OpenIddict only knows about ClaimsPrincipal instances and you're responsible of providing ClaimsPrincipals containing the claims you want OpenIddict to use in your tokens.
You probably guessed it by now: OpenIddict 3.0 is very different from IdentityServer4 and those hoping for a free look-alike will likely be disappointed. Fortunately, implementing an OpenID Connect server using OpenIddict is not hard, and generally consists in copying a few files from the openiddict-samples repository.
There's however something that IdentityServer4 users will likely miss: an equivalent of the popular Skoruba.IdentityServer4.Admin project that offers a GUI to manage users, roles, clients and authorizations. While there's indeed no direct equivalent in OpenIddict itself, the OrchardCore project has a native OpenID module based on OpenIddict that includes a clients management feature. This feature is still young and quite limited (read, not as complete as Skoruba.IdentityServer4.Admin), but it's actively developed and contributions are always welcome.
In this blog post, I'll demonstrate how this management GUI can be used with an existing OpenIddict server (typically located in another project).
So here we go:
Download the OpenIddict samples solution
For that, clone the https://github.com/openiddict/openiddict-samples repository.
For this tutorial, we'll use the Velusia.Server demo, a very typical ASP.NET Core application that implements code flow support. Launch it via Visual Studio or using dotnet run and make sure the openiddict-velusia-sample database is correctly created by Entity Framework Core in your local (localdb)\MSSQLLocalDB SQL Server instance.
Create a new empty ASP.NET Core project, reference the OrchardCore CMS metapackage and register the OrchardCore services and middleware
To simplify things, we'll opt for the "complete" OrchardCore CMS approach, that offers a GUI-based setup experience. For that, reference the following package:
1 | <Project Sdk="Microsoft.NET.Sdk.Web"> |
Then, update your Startup class to register the OrchardCore CMS services and middleware:
1 | using Microsoft.AspNetCore.Builder; |
At this point, you're ready to launch the application and configure OrchardCore:
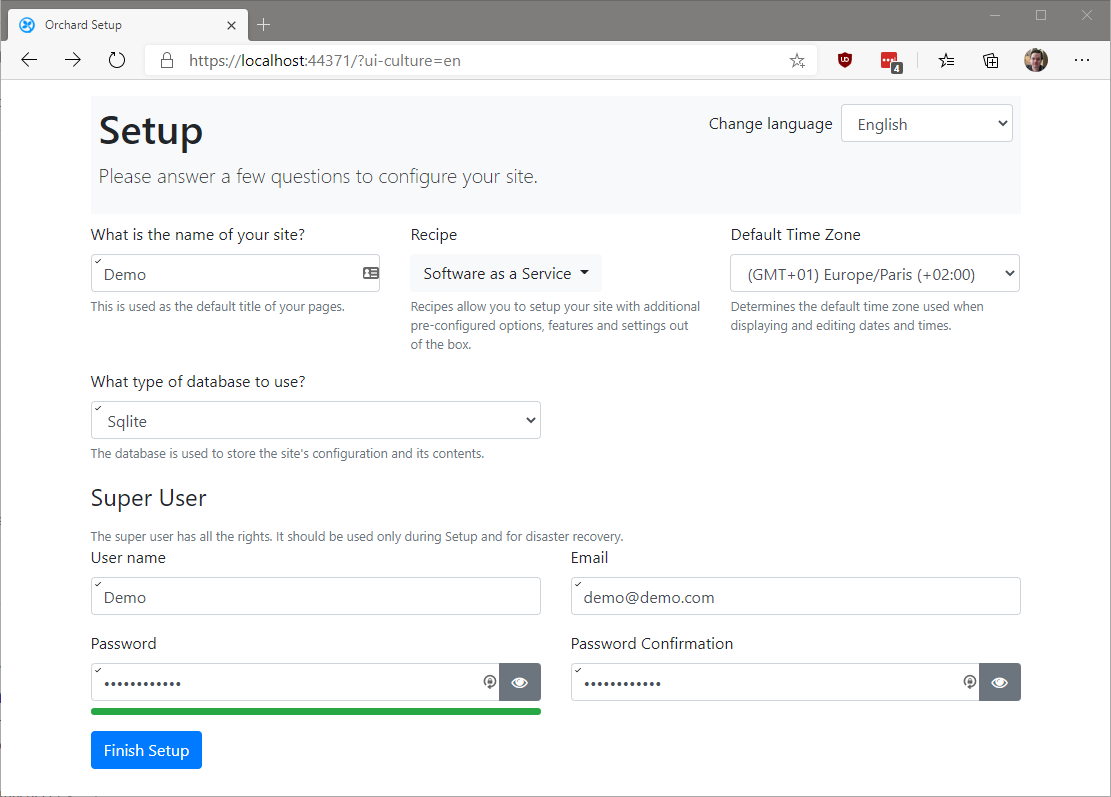
Fill in the form and press "finish setup".
The database configured at this stage will only be used by OrchardCore. We'll later configure the OpenID module to use Entity Framework Core and SQL Server with the database created by the Velusia.Server demo application.
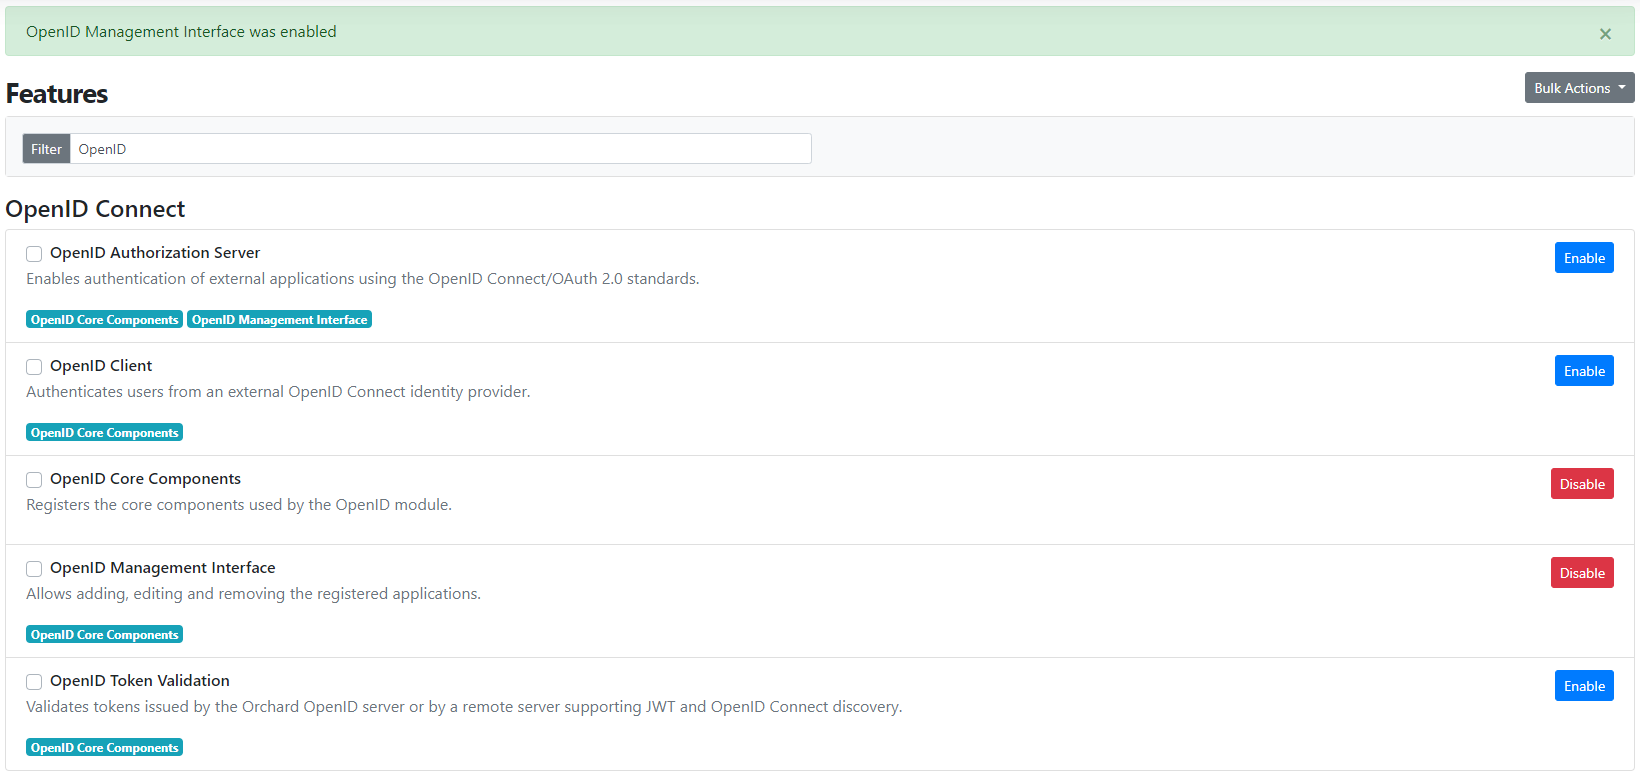
Enable the OpenID management feature in the features admin
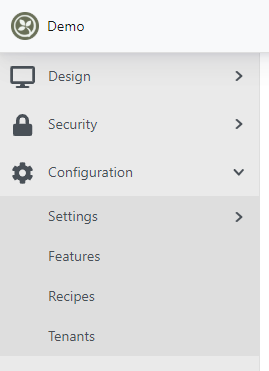
Once set up, log in and click on "Dashboard" to access the administration interface. Then, click on "Features" under "Configuration":
In the features admin, type "OpenID" to filter the available features and enable the "OpenID management interface" feature:
Reference the OpenIddict Entity Framework Core stores and register them
At this stage, if you visit the client applications administration page, you should see an empty list:
That's expected: by default, the management interface points to the local OrchardCore database and not (yet) to openiddict-velusia-sample.
To fix that, we'll need to reference the OpenIddict Entity Framework Core package, so that the management UI can directly communicate with the openiddict-velusia-sample database. For that, reference the following packages:
1 | <Project Sdk="Microsoft.NET.Sdk.Web"> |
Final part: adding an EF Core DbContext pointing to the openiddict-velusia-sample database and registering the OpenIddict EF Core stores using the OrchardCore APIs:
1 | using Microsoft.AspNetCore.Builder; |
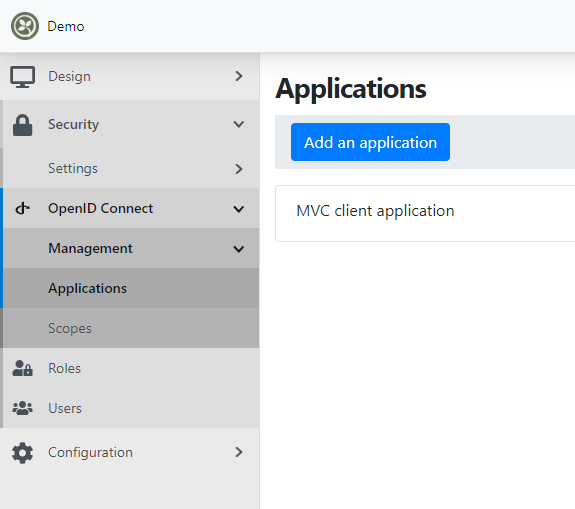
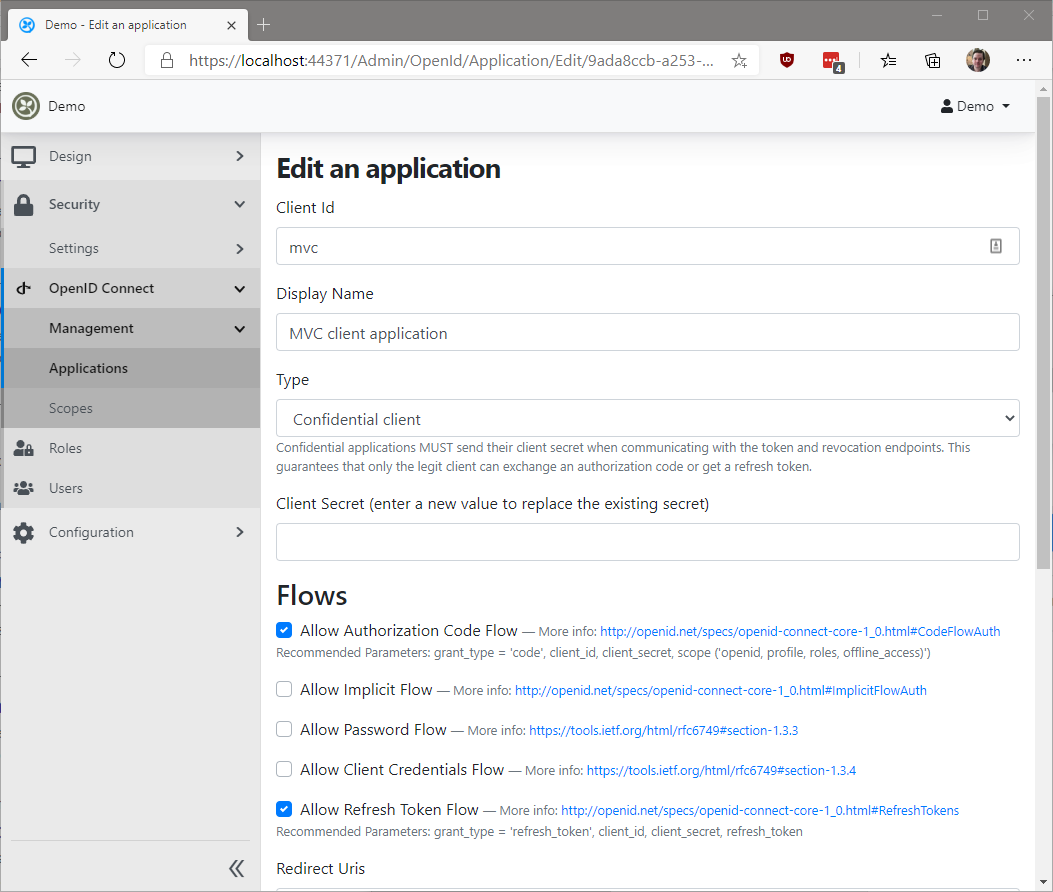
Restart the application and visit the applications administration page. If everything is correctly configured, you should see the MVC client application entry corresponding to the Velusia.Client demo application registered by Velusia.Server.
From here, you can easily update the application entry by clicking on "Edit":
Voilà!